Mastering One-Point Perspective: Essential Guide for Interior Design and Architecture Students
/
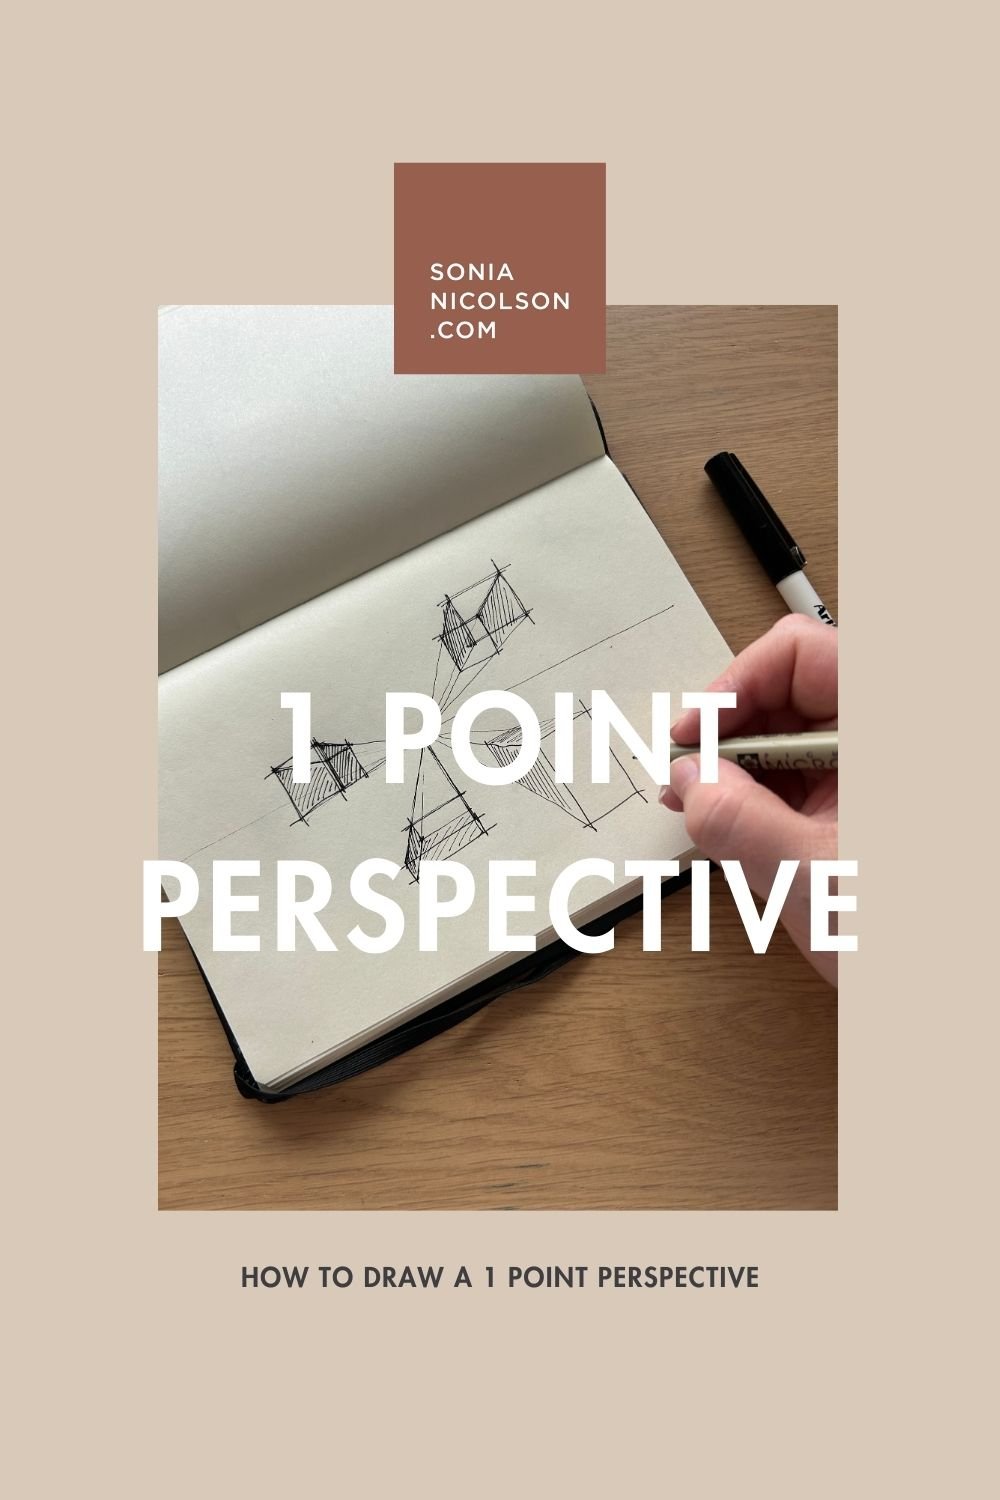
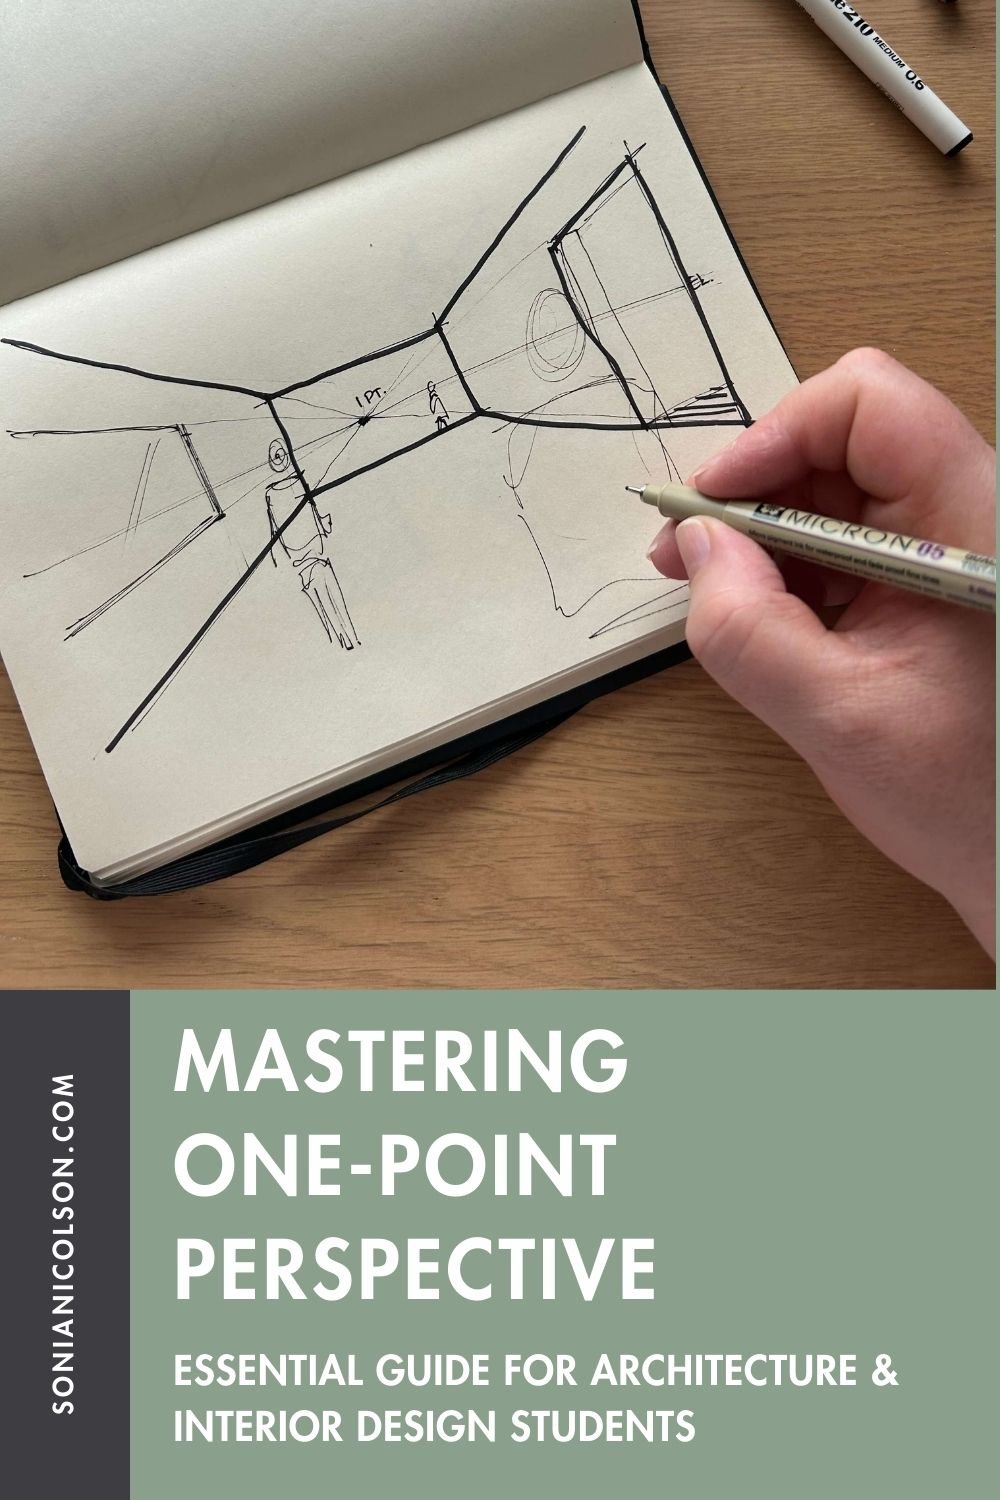
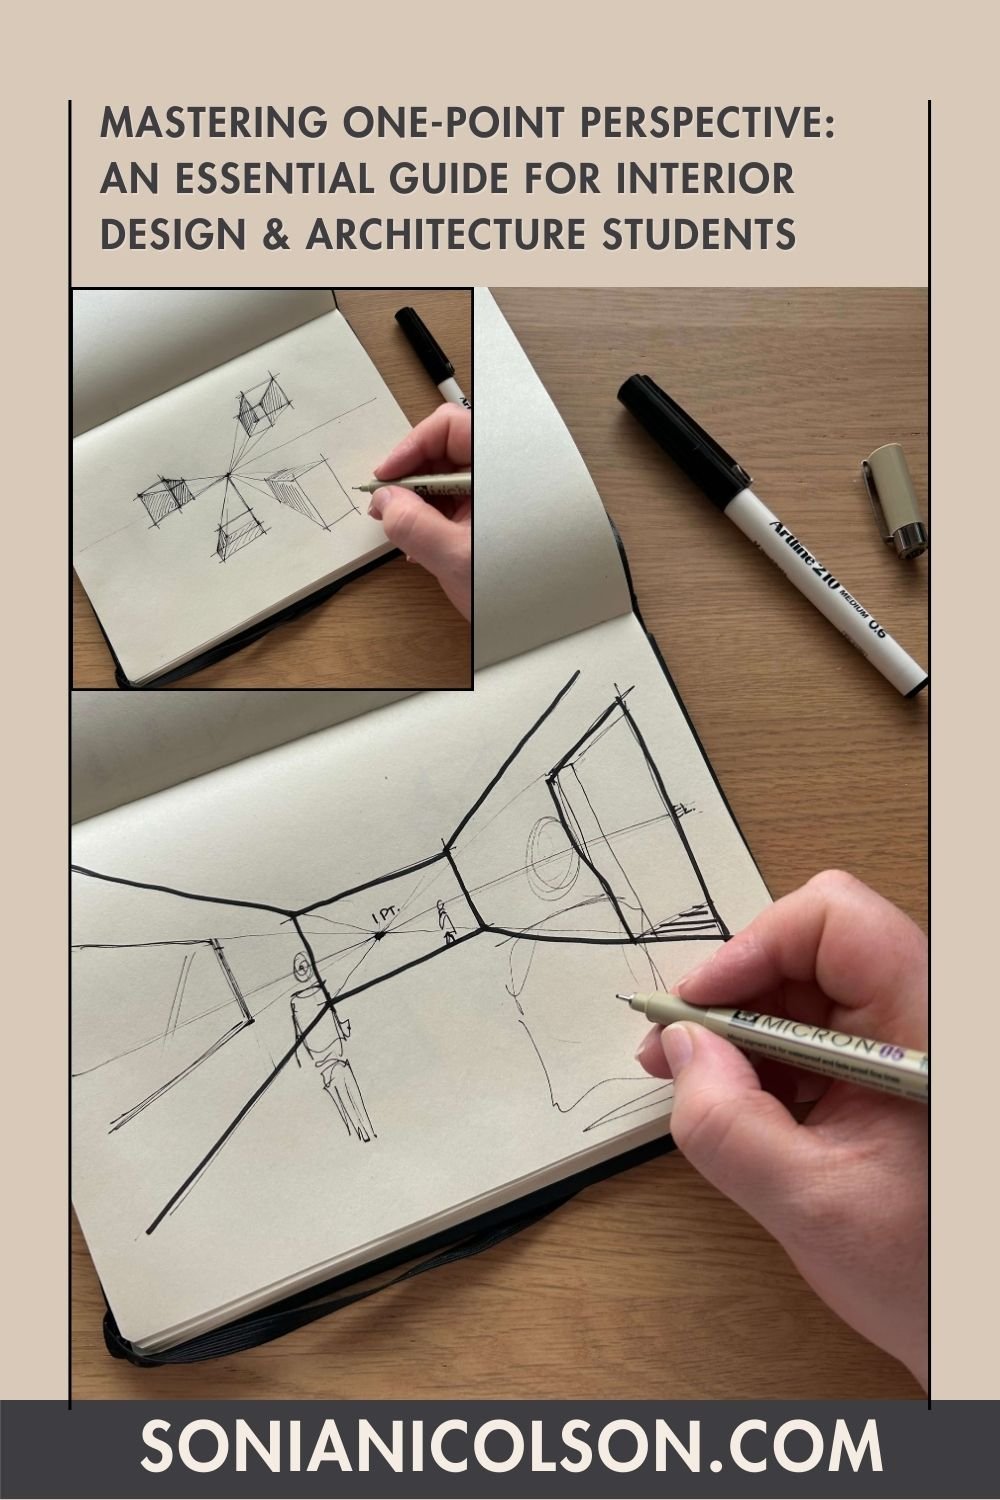
Mastering One-Point Perspective
An Essential Guide for Interior Design and Architecture Students
Mastering a one-point perspective is essential for Interior Design and Architecture students to create realistic and compelling drawings. By following the steps outlined in this guide, you can improve your perspective drawing skills and enhance your design projects.
Why Learn Perspective:
Learning perspective is essential for anyone in visual communication, design, or spatial planning (interior design, architecture). It not only improves technical drawing skills but also enhances creativity, spatial awareness, and problem-solving abilities.
Being able to draw a realistic perspective allows designers to accurately represent 3D design ideas in 2D presentations.
Learning perspective helps us understand spatial relationships between objects in a scene, crucial for designing functional spaces in architecture and interior design.
Perspectives serve as a universal language for Architects and Interior Designers to help communicate concepts to clients.
Mastering the art of drawing a perspective requires a good understanding of geometric concepts and applying them to visual representations. This process enhances problem-solving skills and teaches individuals to think critically when planning and executing design projects.
The ability to draw perspective drawings is a great skill to have if you are looking to work in architecture, interior design, industrial design, and graphic design. It demonstrates a level of technical skill and attention to detail that is highly valued in these industries.
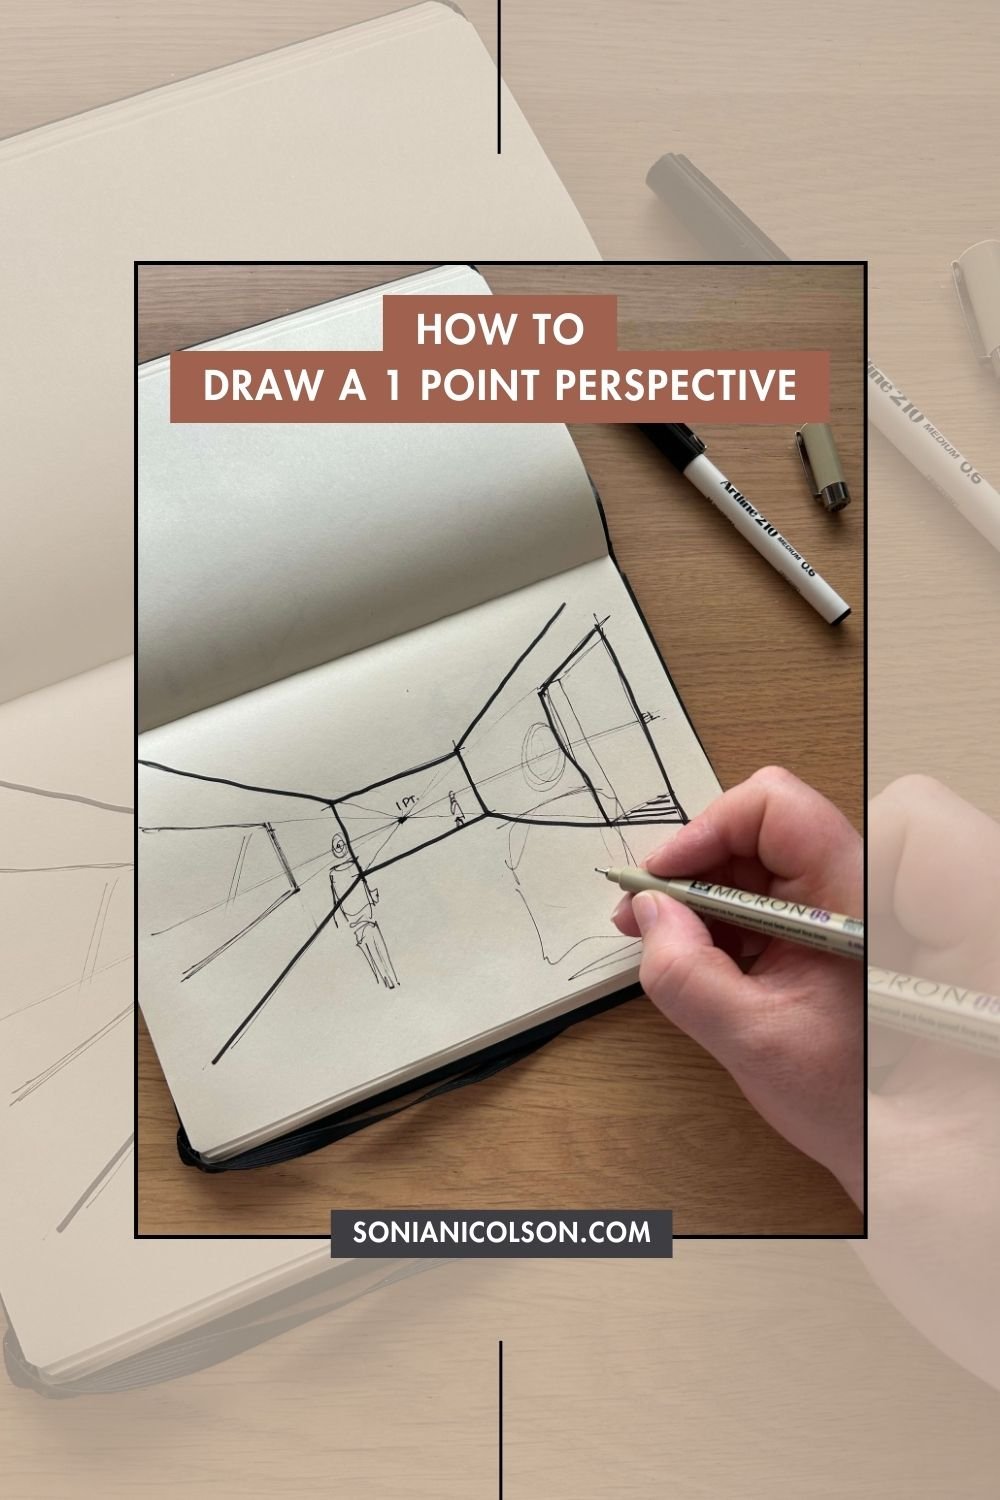
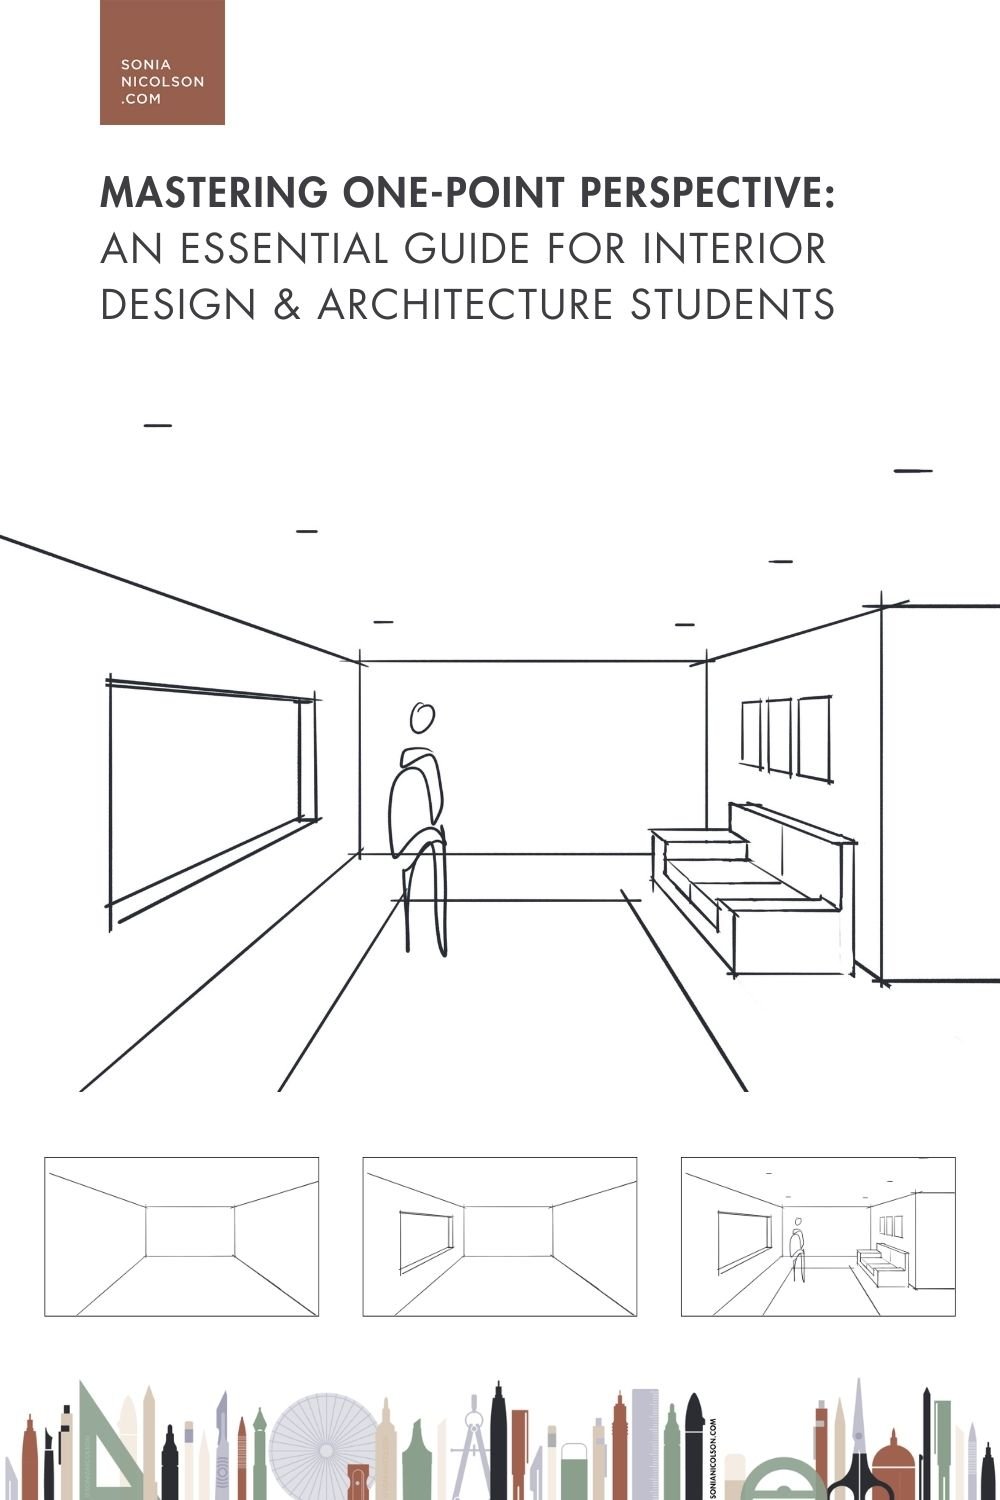
How to Draw a One-Point Interior Perspective:
Let’s get started. Here, we break down the steps of drawing a one-point perspective to help you master this essential skill for your design projects.
1. Gather your drawing materials: paper, ruler, pencil, pen or iPad and apple pen. Tape down your paper if needed.
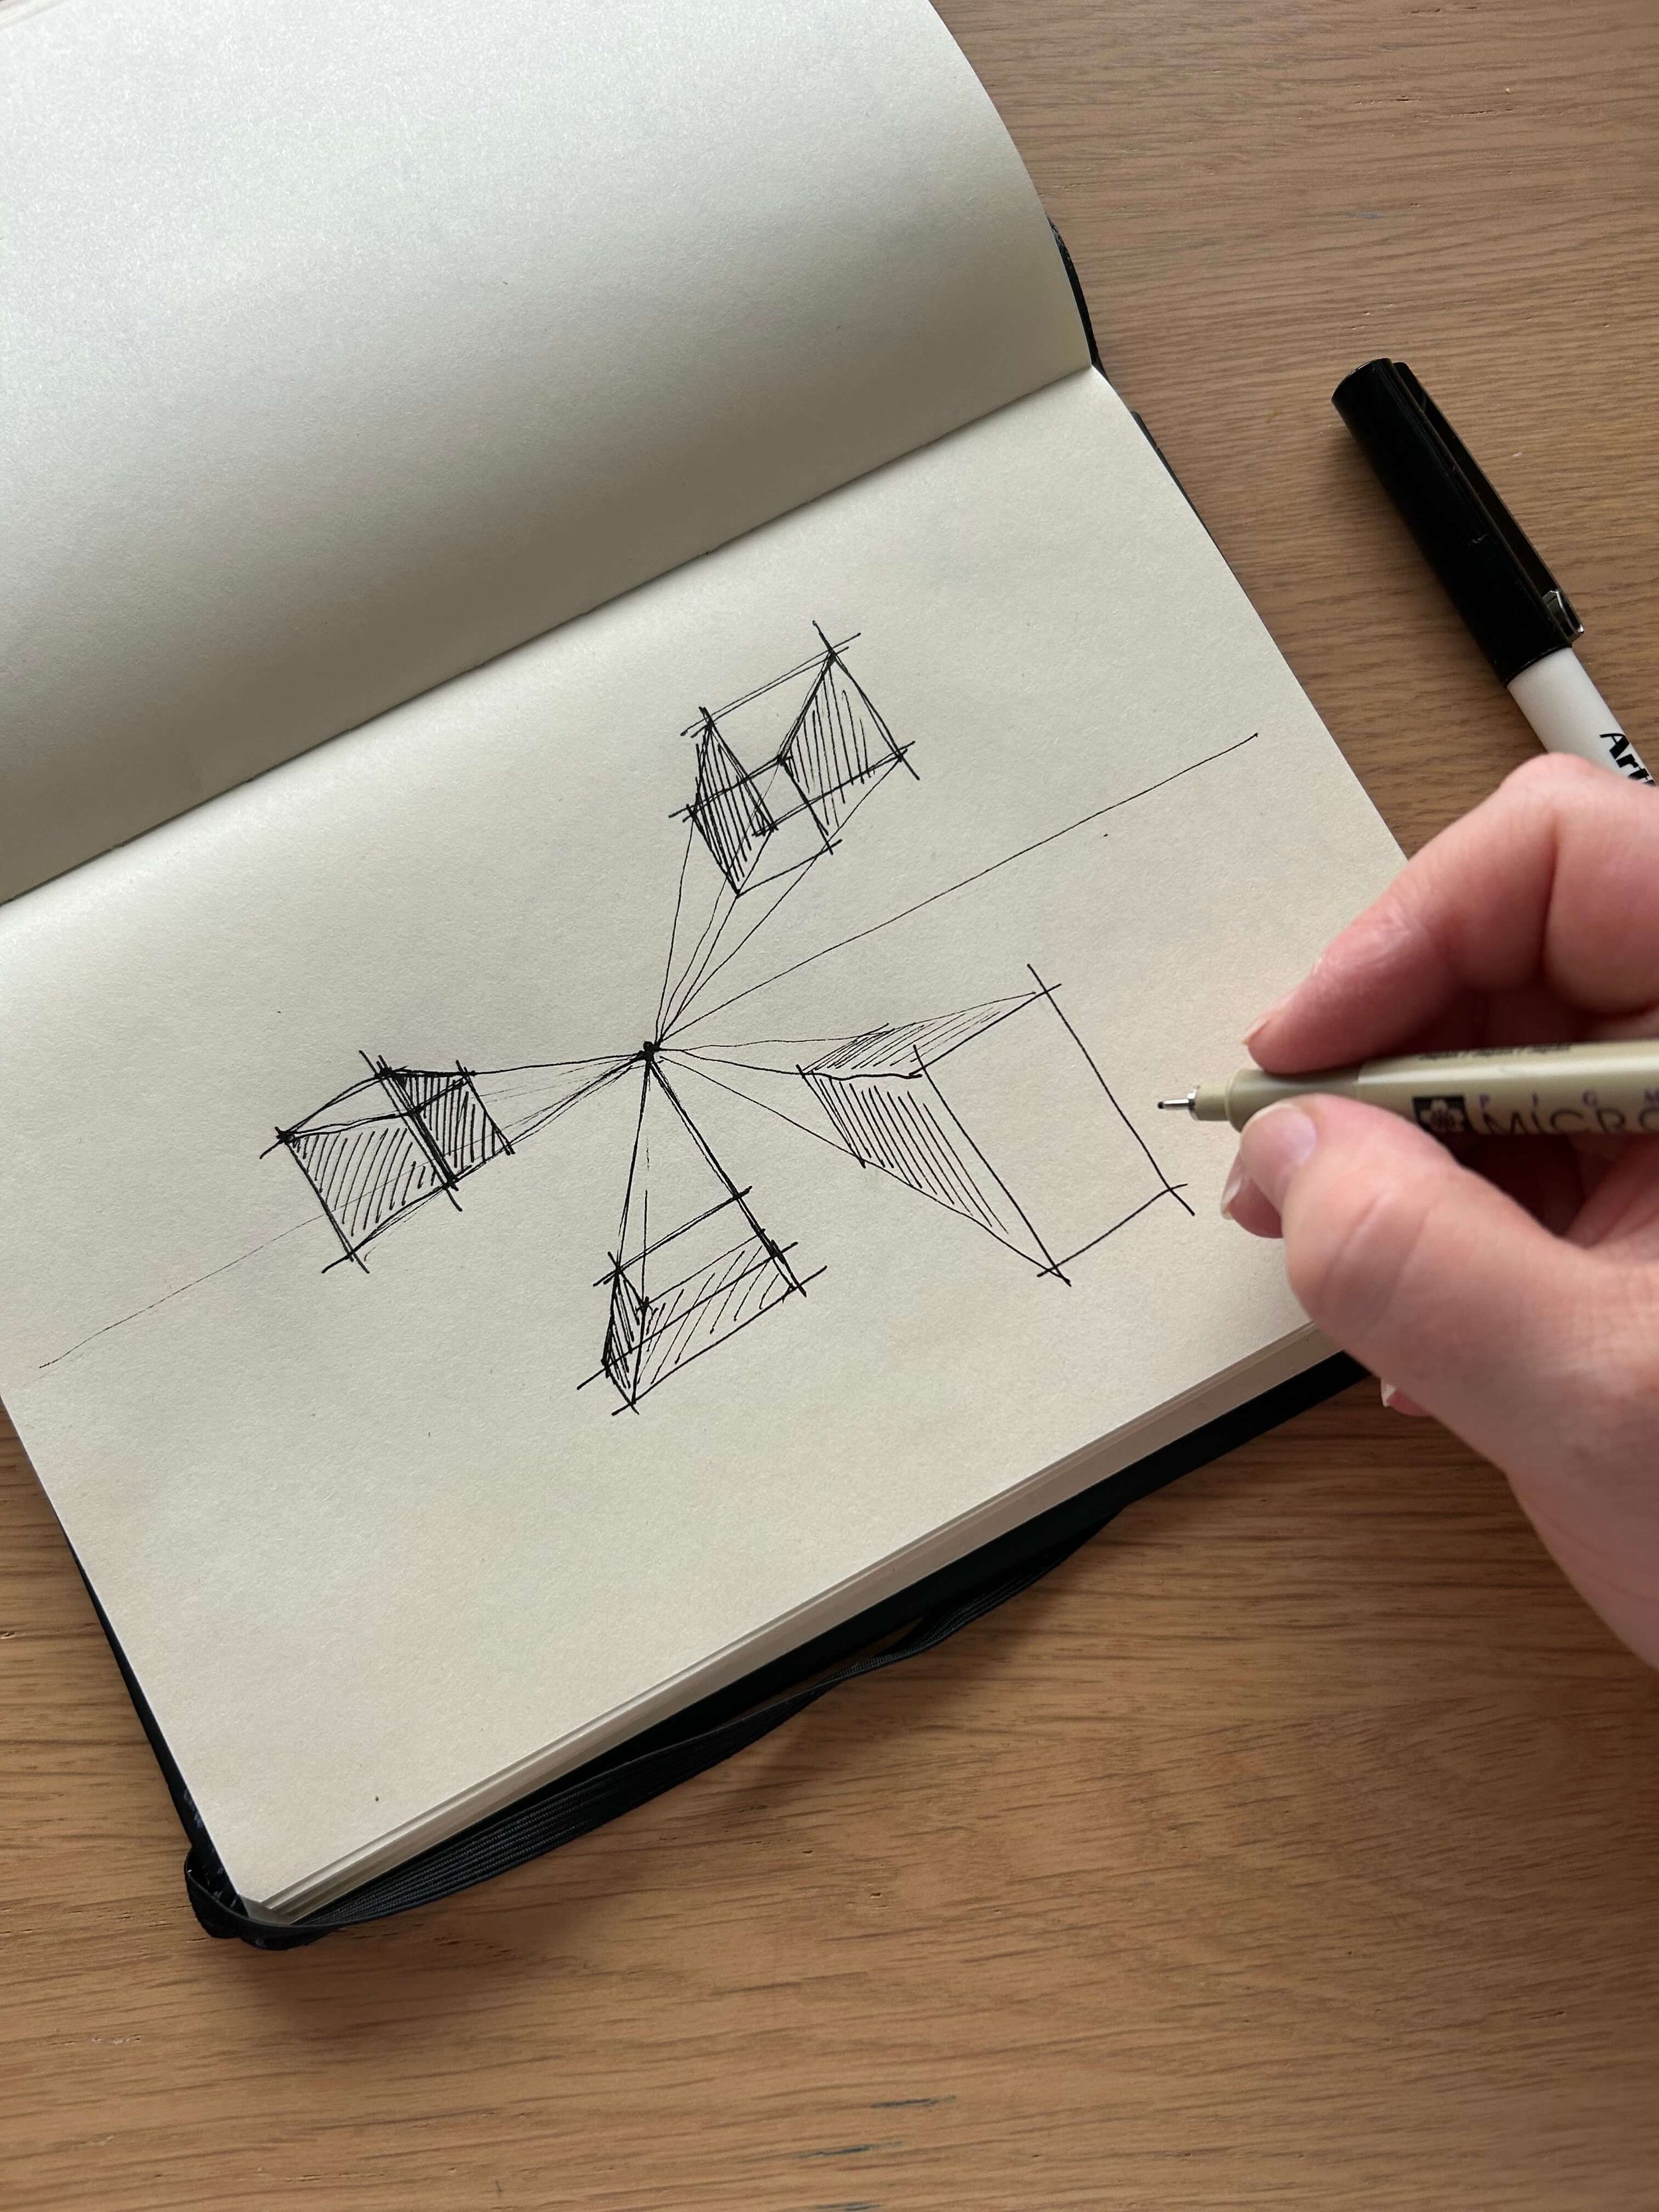
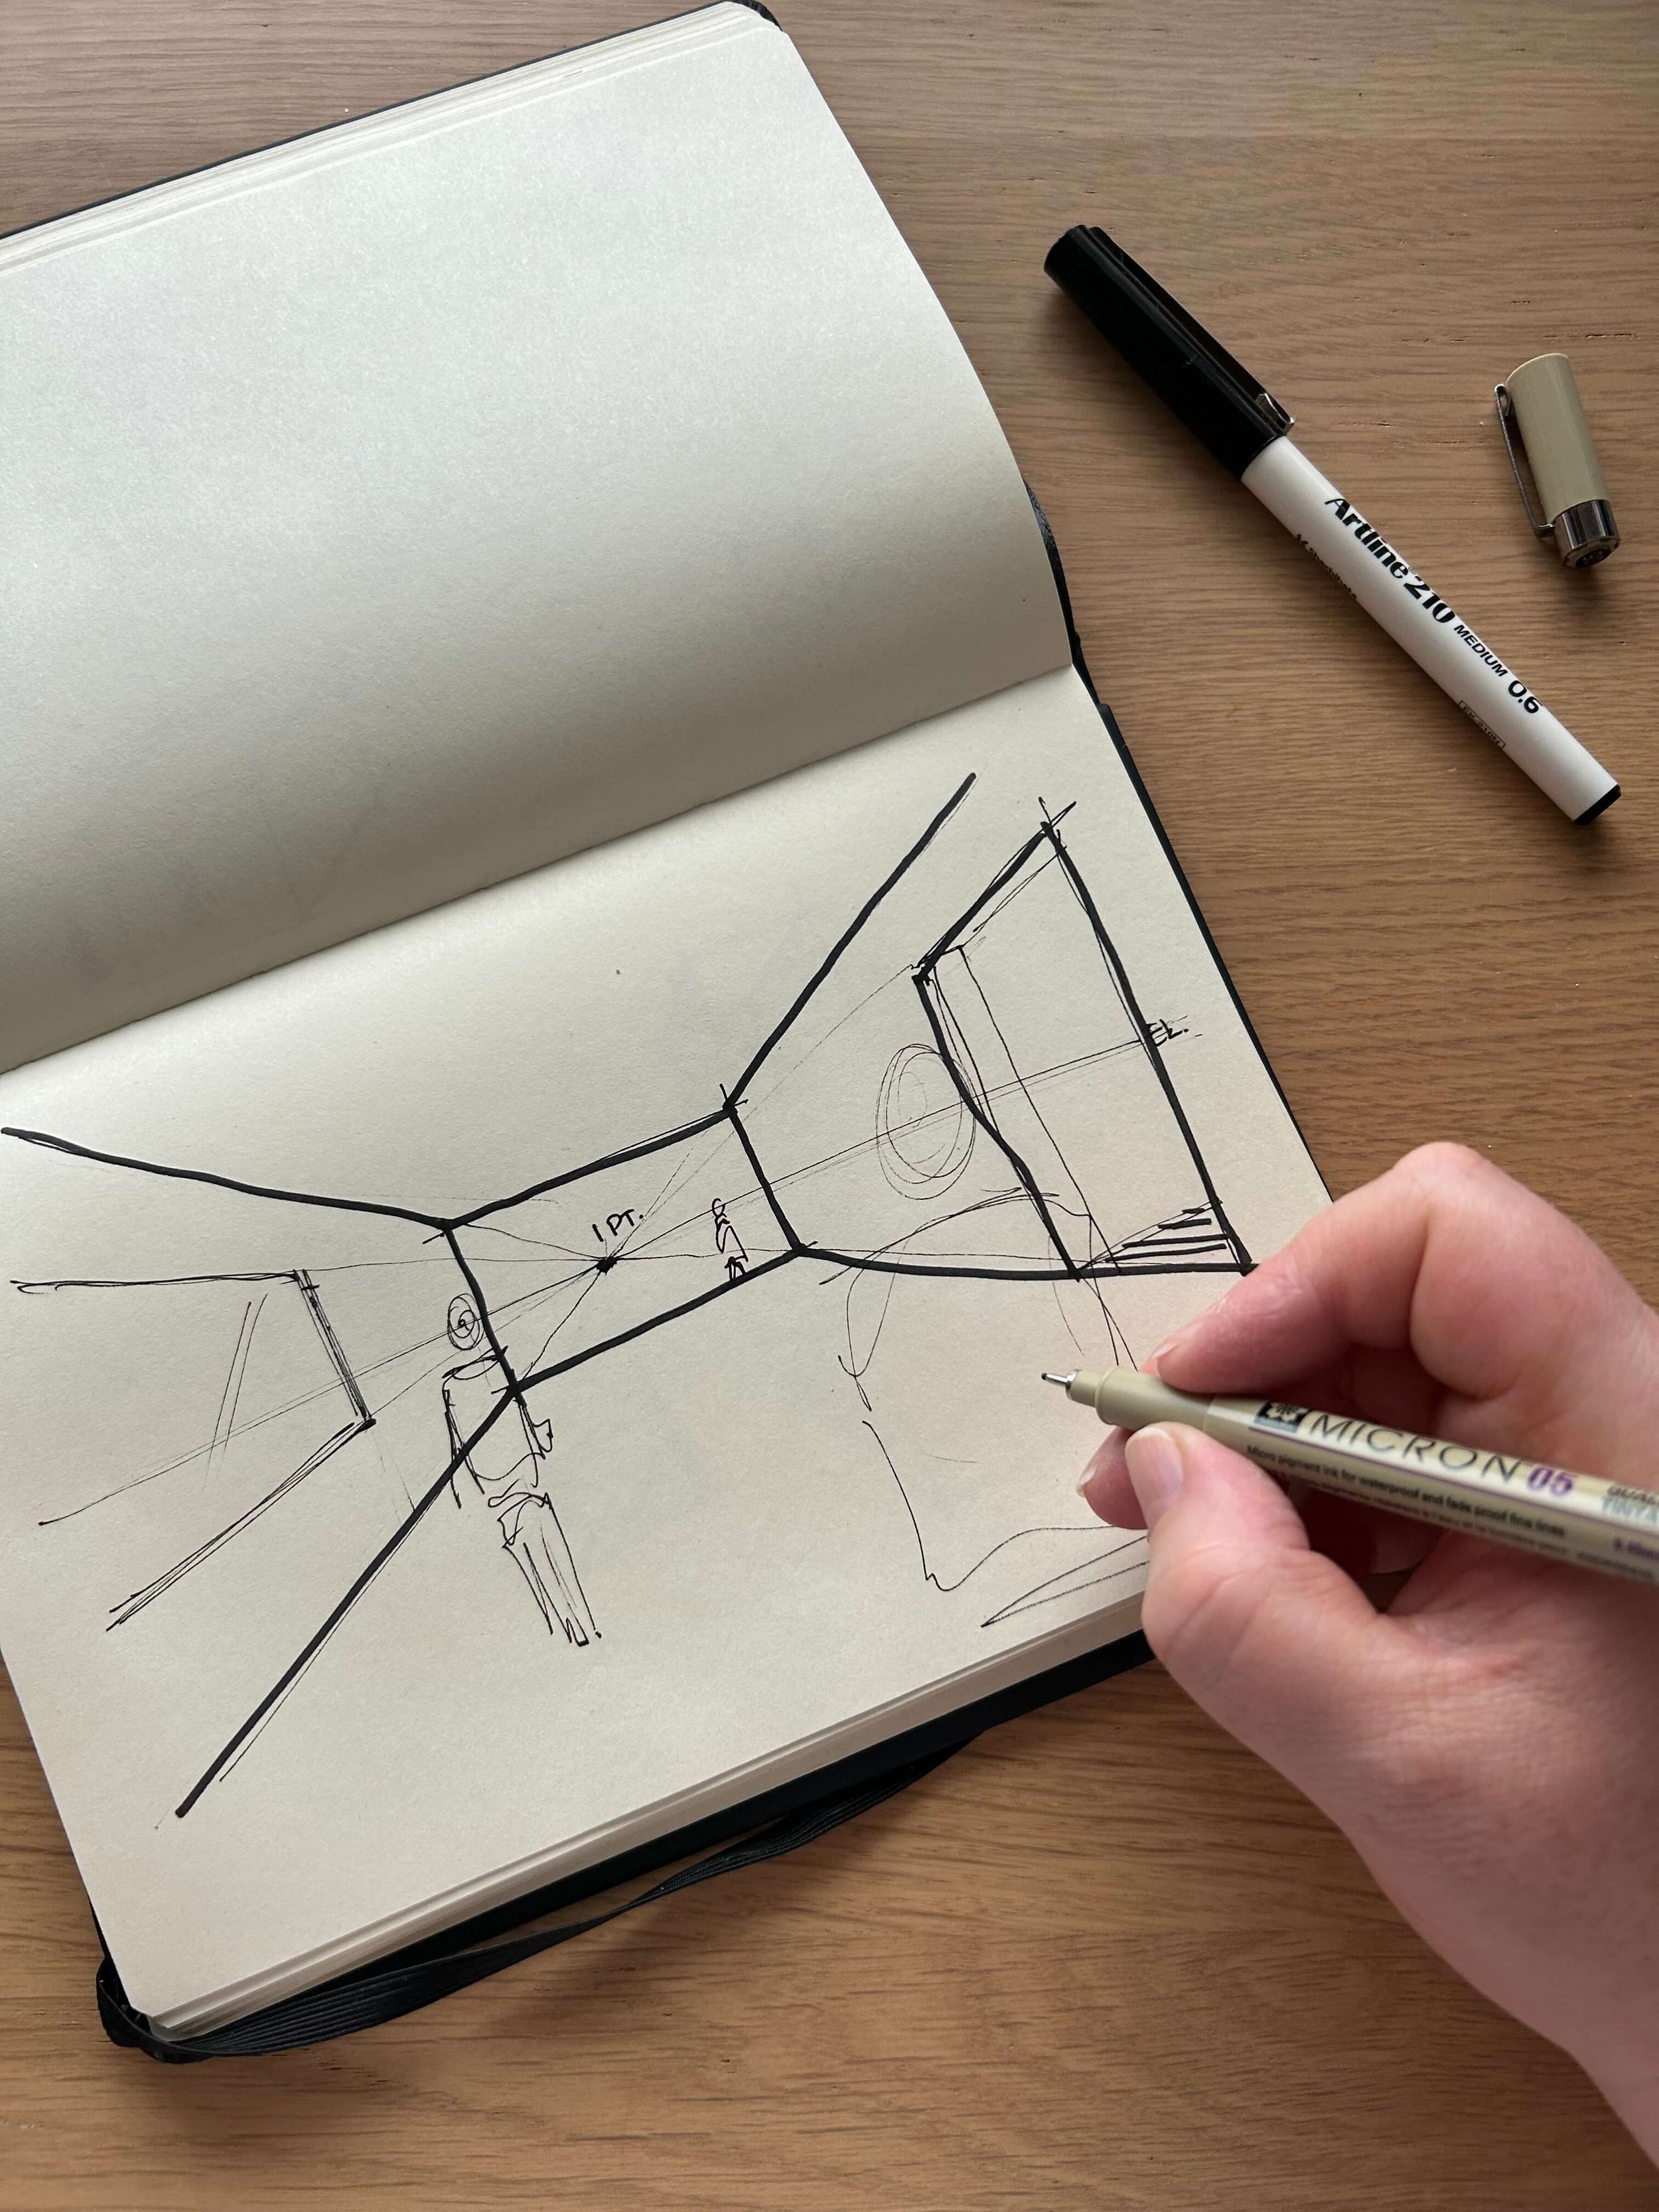
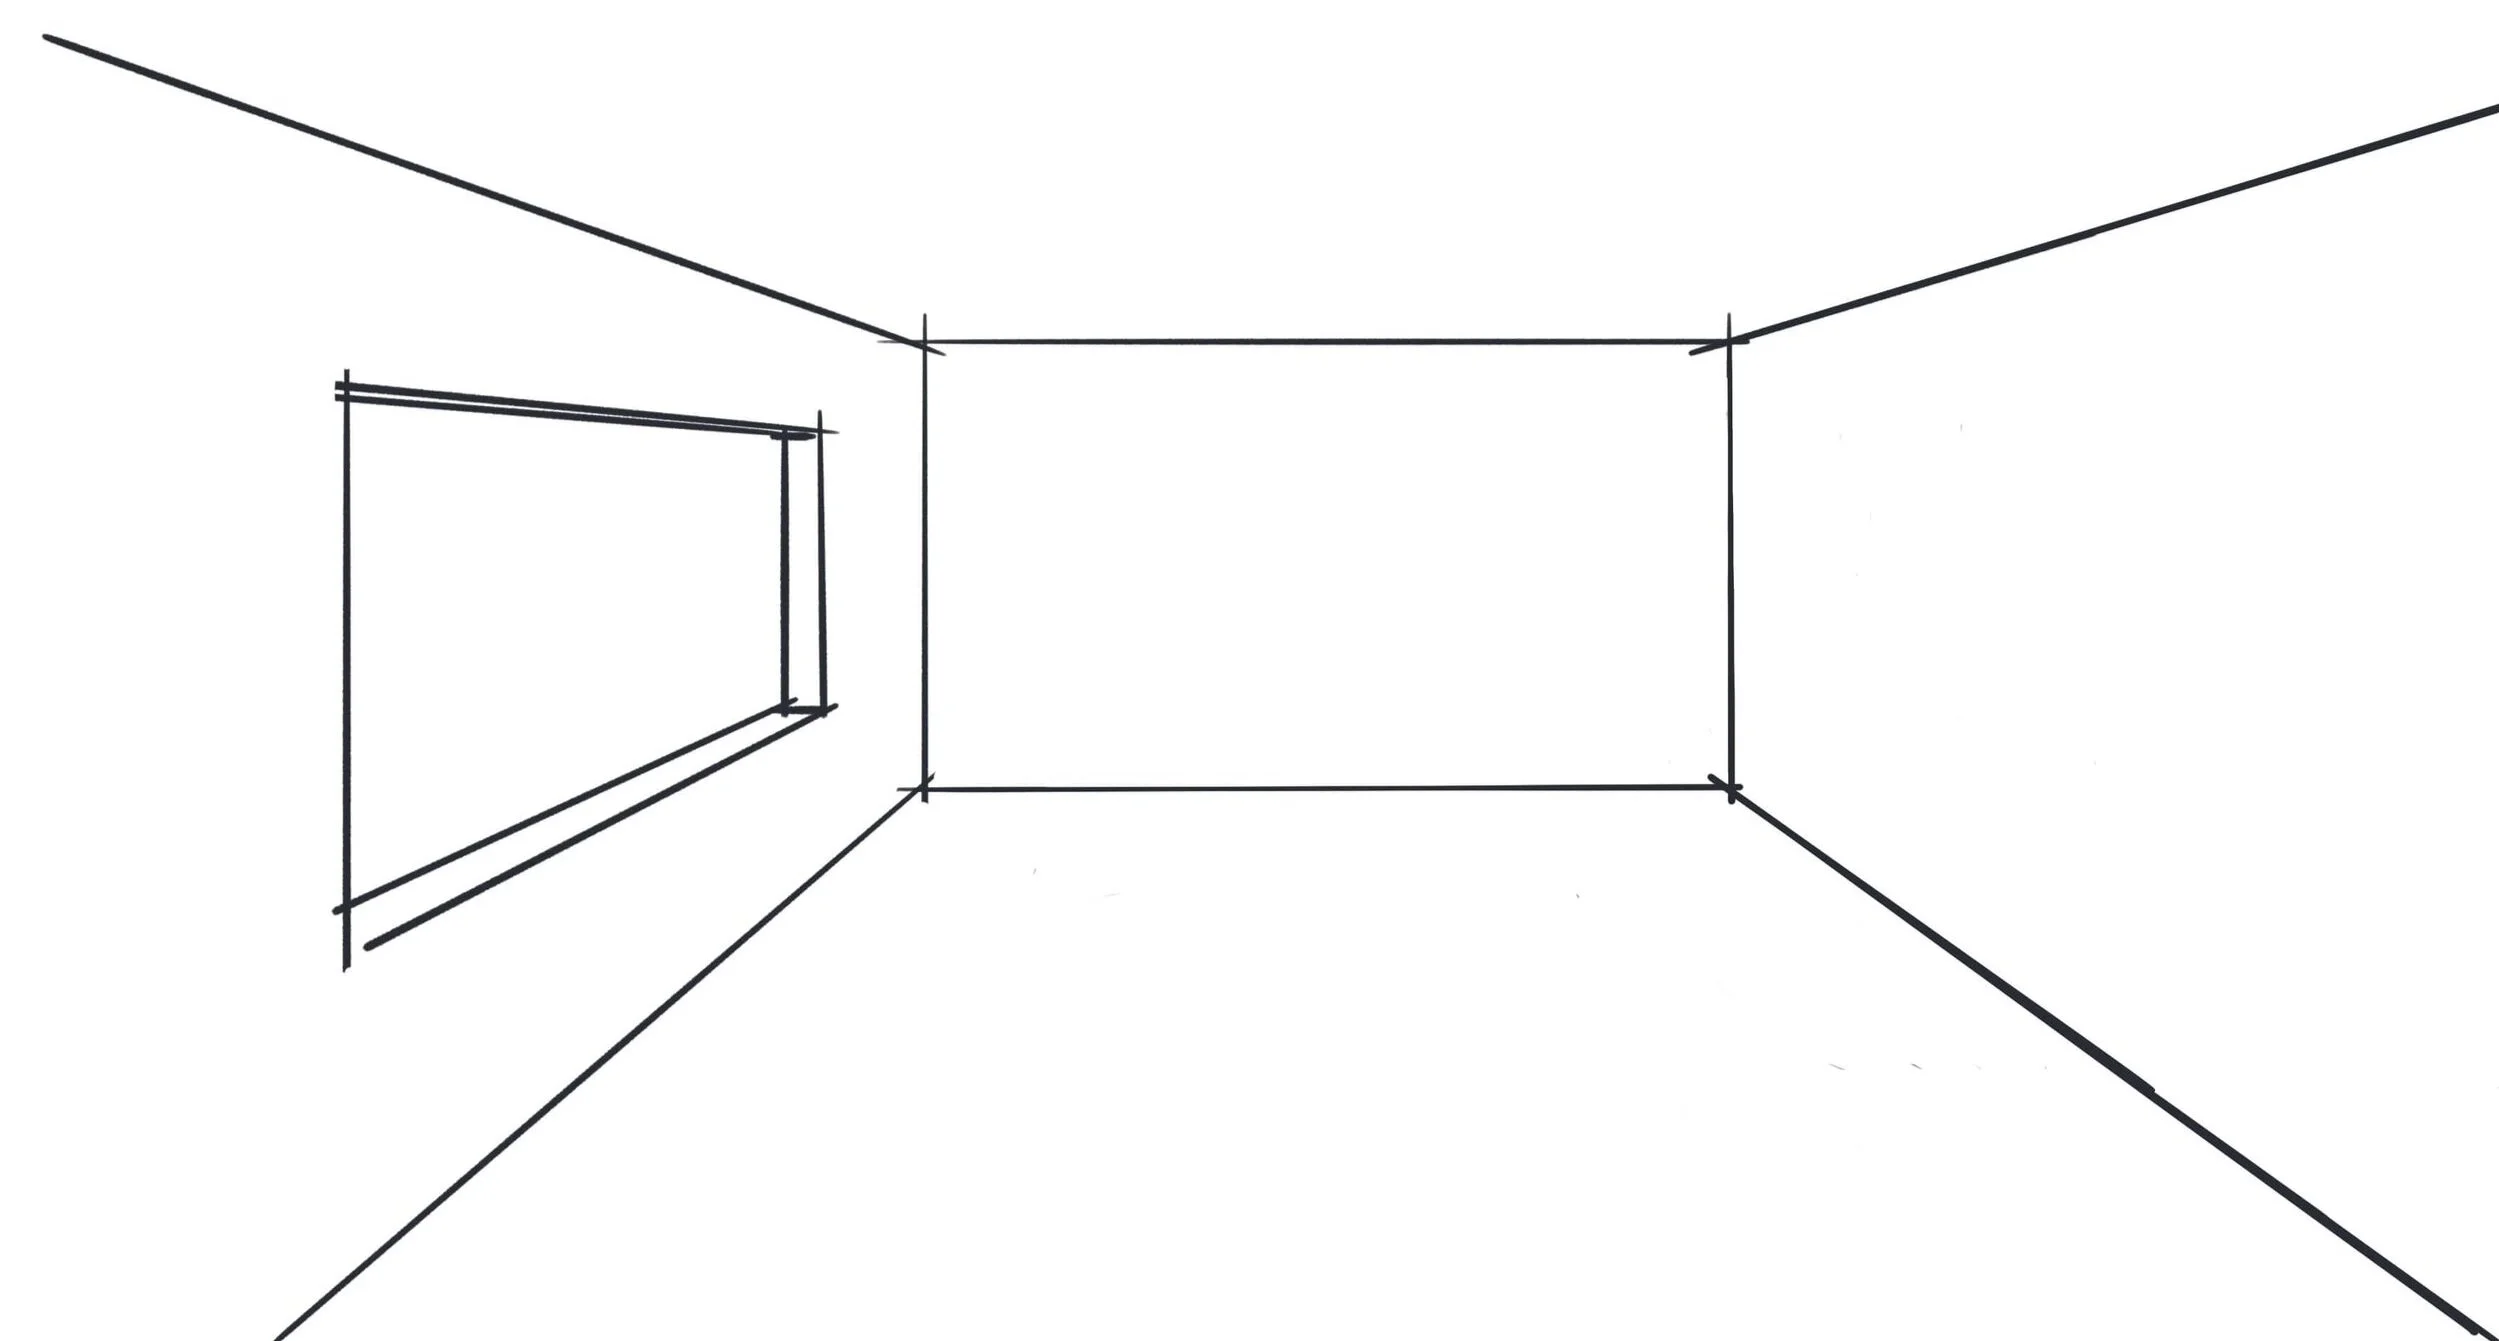
2. Establishing the horizon line and vanishing point: The first line we draw is a horizon line, draw this in the centre of your paper going along it. Now mark your vanishing point in the middle of the line.
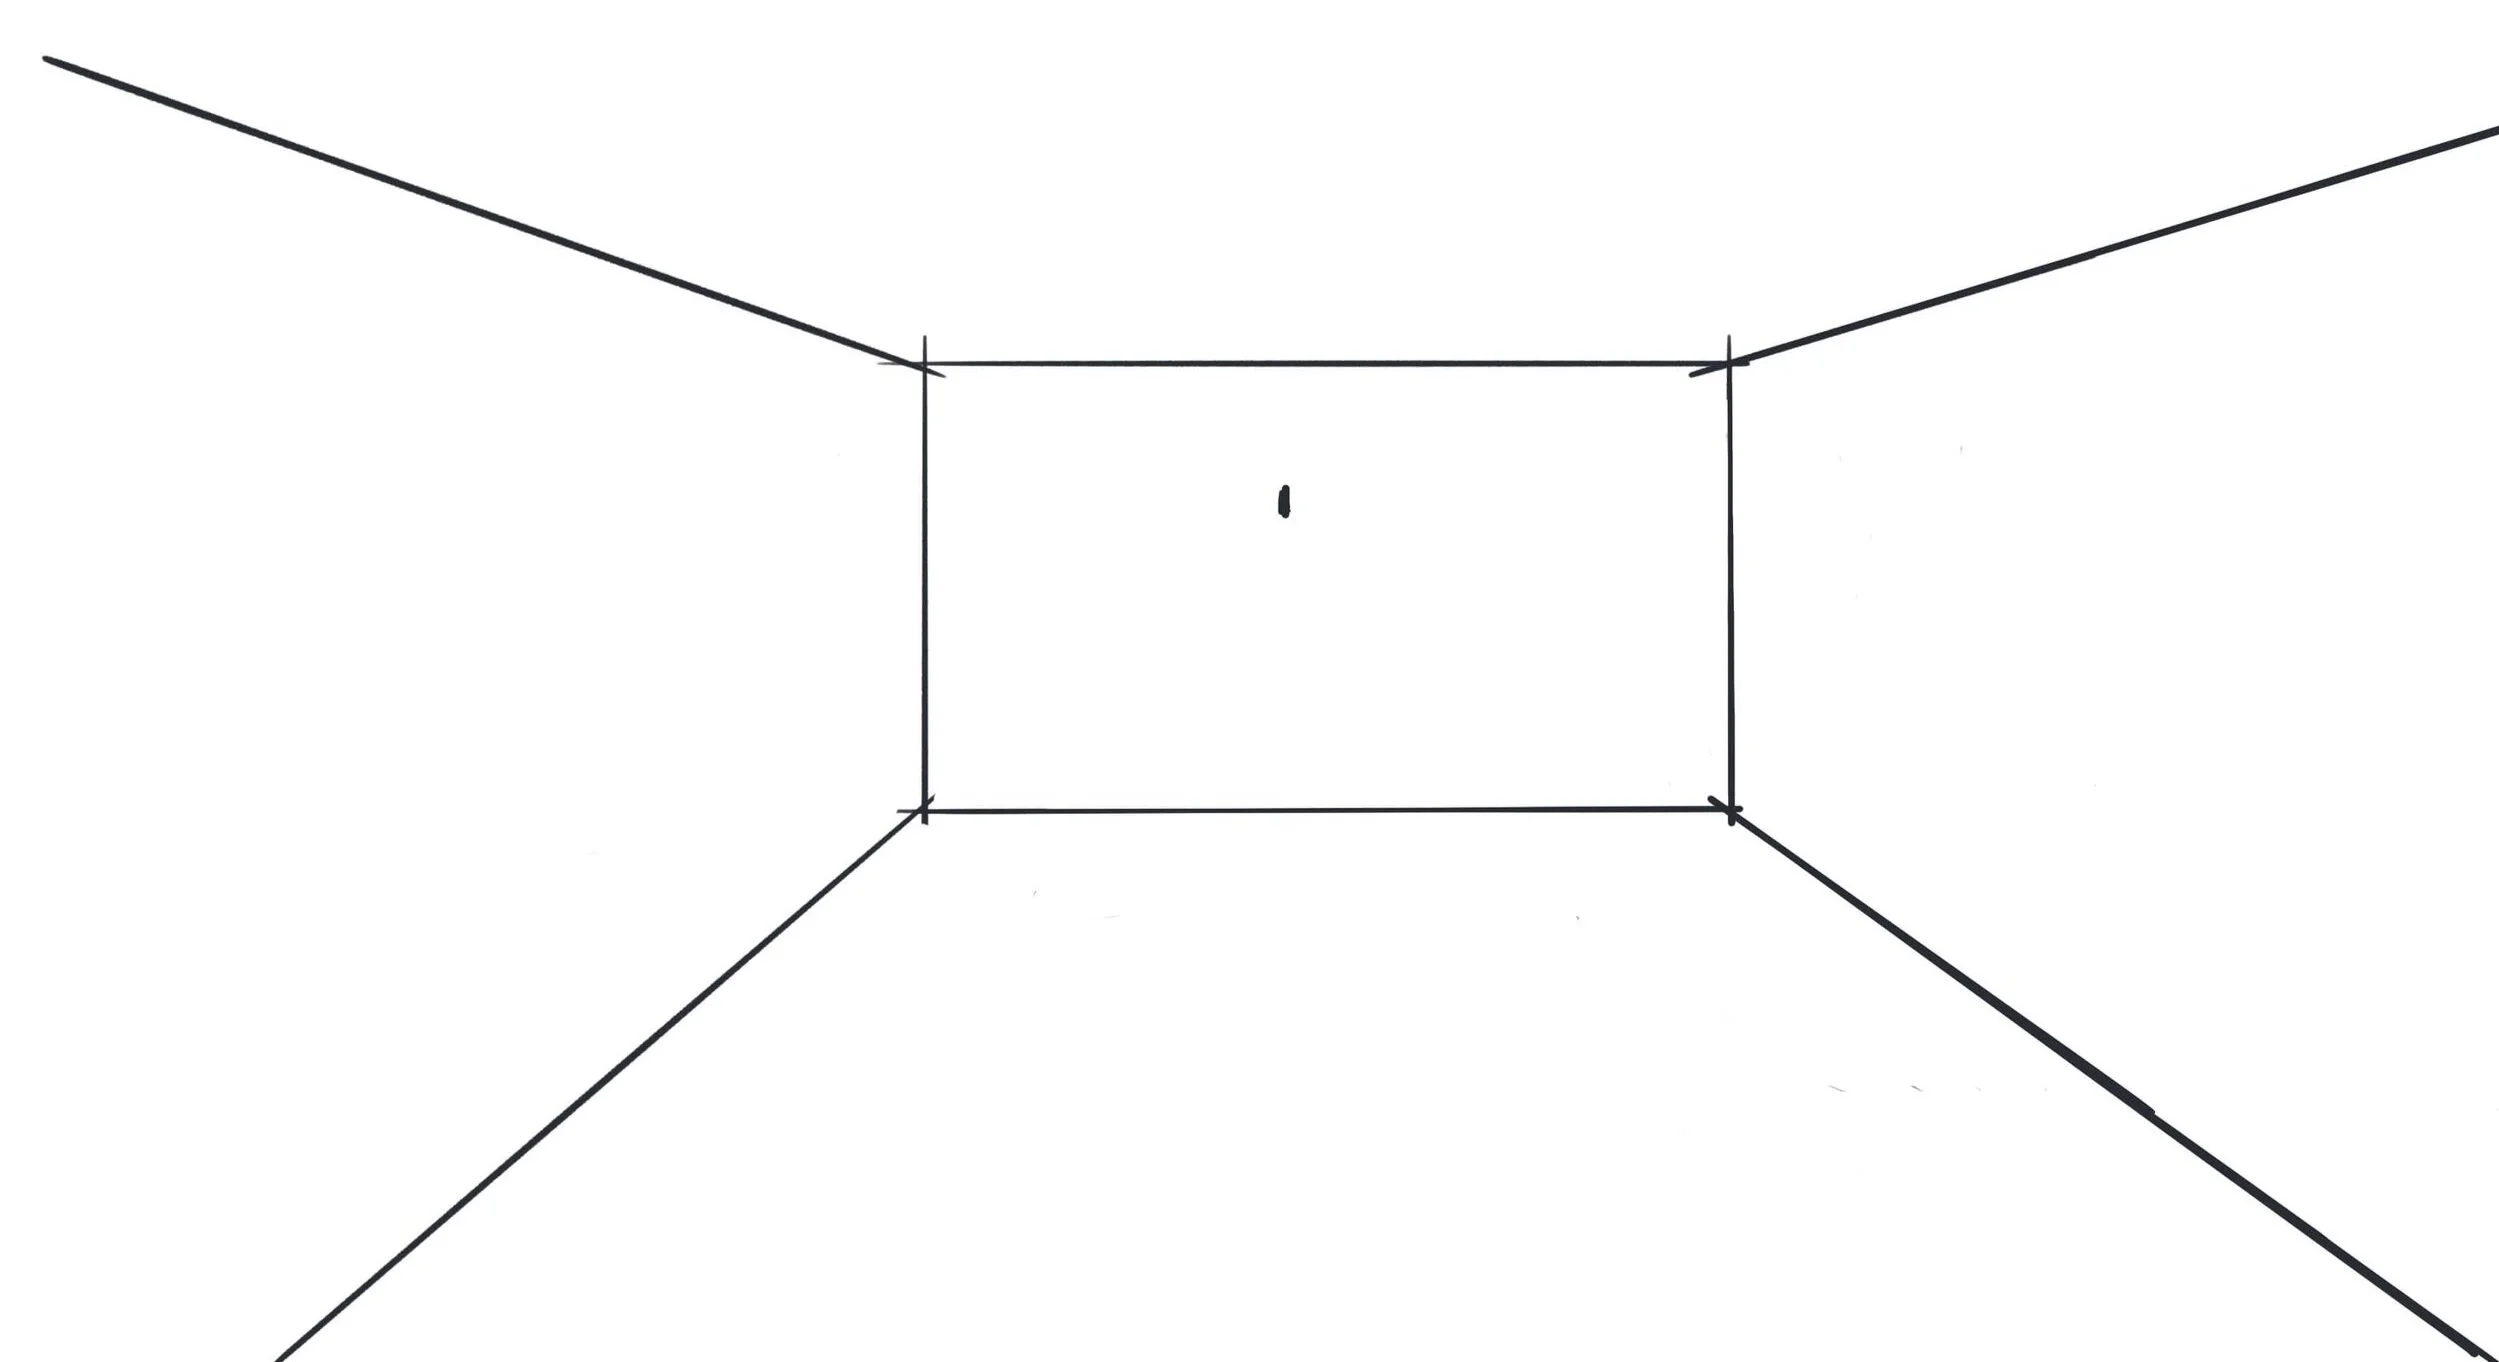
3. Sketching basic shapes to form a room: Start with a simple rectangle for the back wall. Line up your ruler from the vanishing point to each of the four corners of the rectangle and draw a line to create the walls, floor and ceiling in perspective.
4. Adding depth to the room: To add in doors and windows, etc you need to draw vertical lines to represent the height of objects in the room. Use the vanishing point to create perspective lines for the sides of objects so line your ruler up with the vanishing point and draw a line for the top of the door.
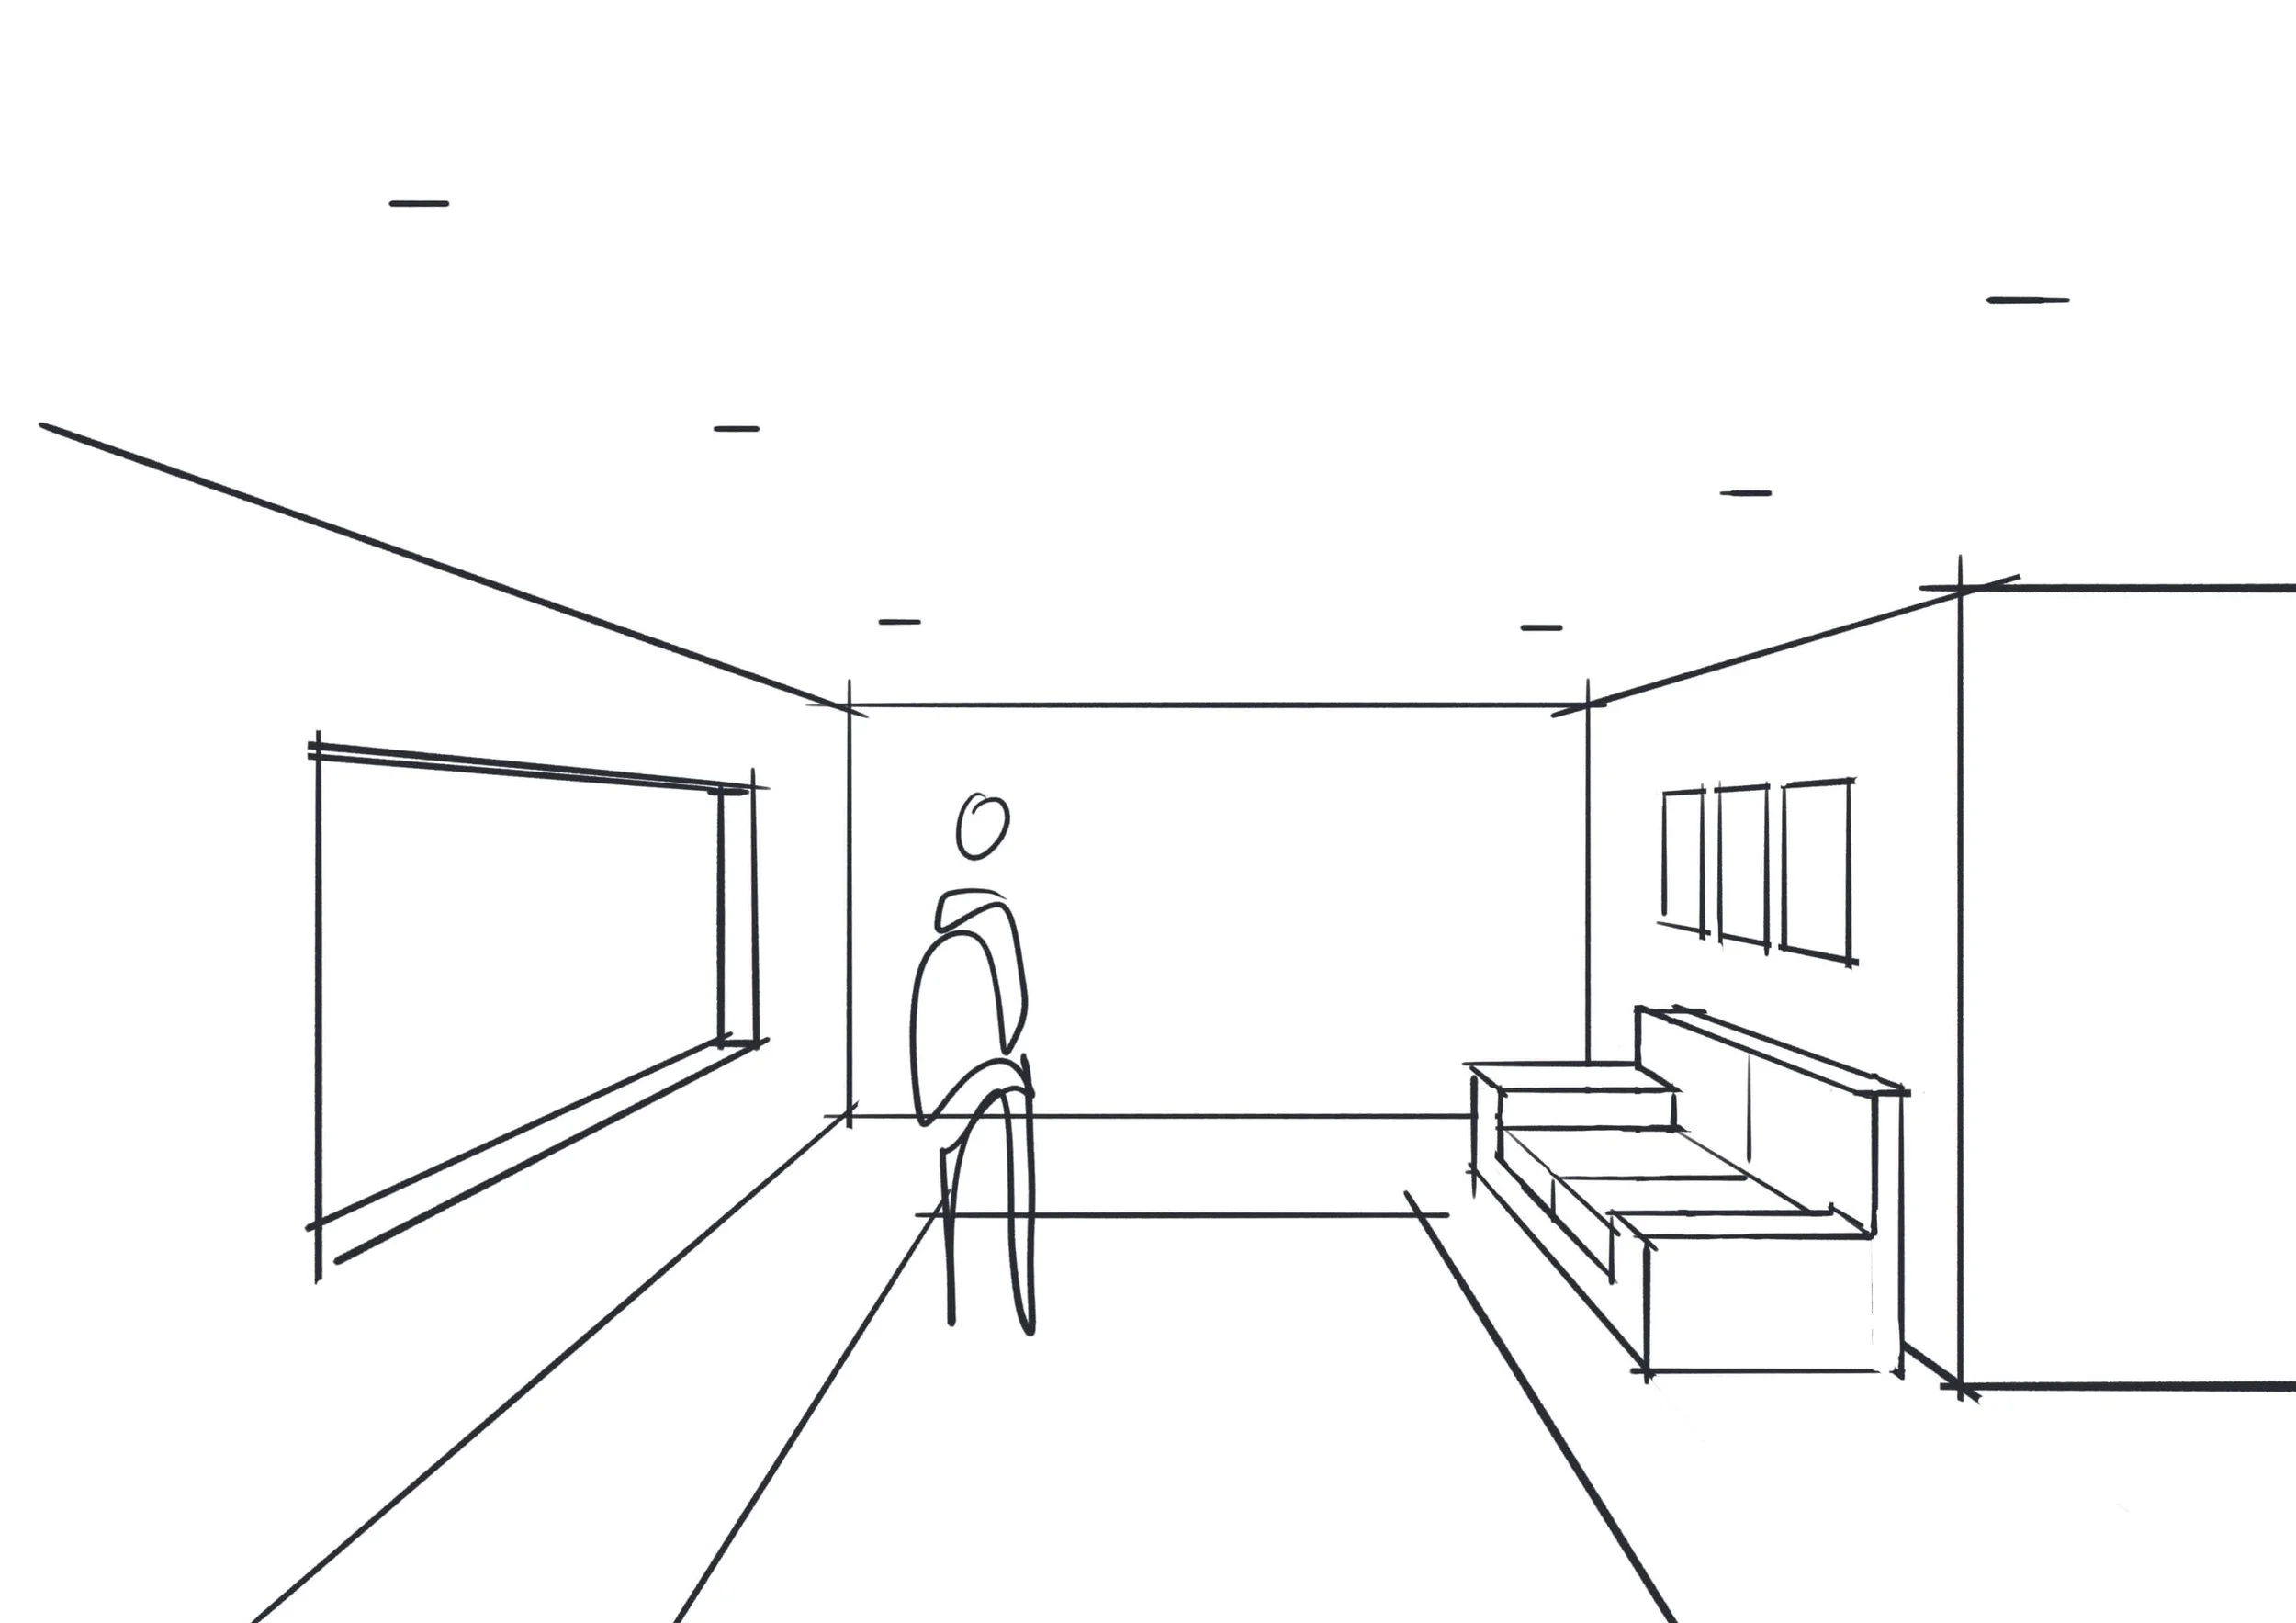
5. Adding details and refining: Add details such as furniture and decoration like frames, rugs, lights and a person (remember their eyes will be on the eye line). To clean up your drawing, erase or rub out any unnecessary construction lines and ink up your finished drawing.
Join our email list to access our Resource Library which includes perspective practice sheets to help you in levelling up your drawing skills.
pin it