Project Brief: My Room, My Interior

Looking to boost your Art & Design Portfolio content for College or University application? Using found objects and materials you are going to build a scale model of your bedroom

For those looking to study spatial design - interior, architectural, model making - being able to make a model (especially to scale) is an important skill in communicating and developing ideas.

This project is ideal for students applying to:

  • ModelMaking

  • Interior Design

  • Interior Architecture

  • Architecture

What is ModelMaking?

Modelmaking is a skill in itself. Model makers study a degree lasting typically 3 years where they learn everything it takes to create 3D models both physical and computerized.

ModelMakers go on to a wide range of roles from freelance work, to in-house at Architecture firms, with product designers right the way up to special effects on movie production.

ModelMaking takes a great deal of time and patience but can be a lot of fun, and if you can show your ability in your portfolio then it’ll set you ahead of the competition as this is not something taught at school level.

What you’ll need:

  • Time and patience!!

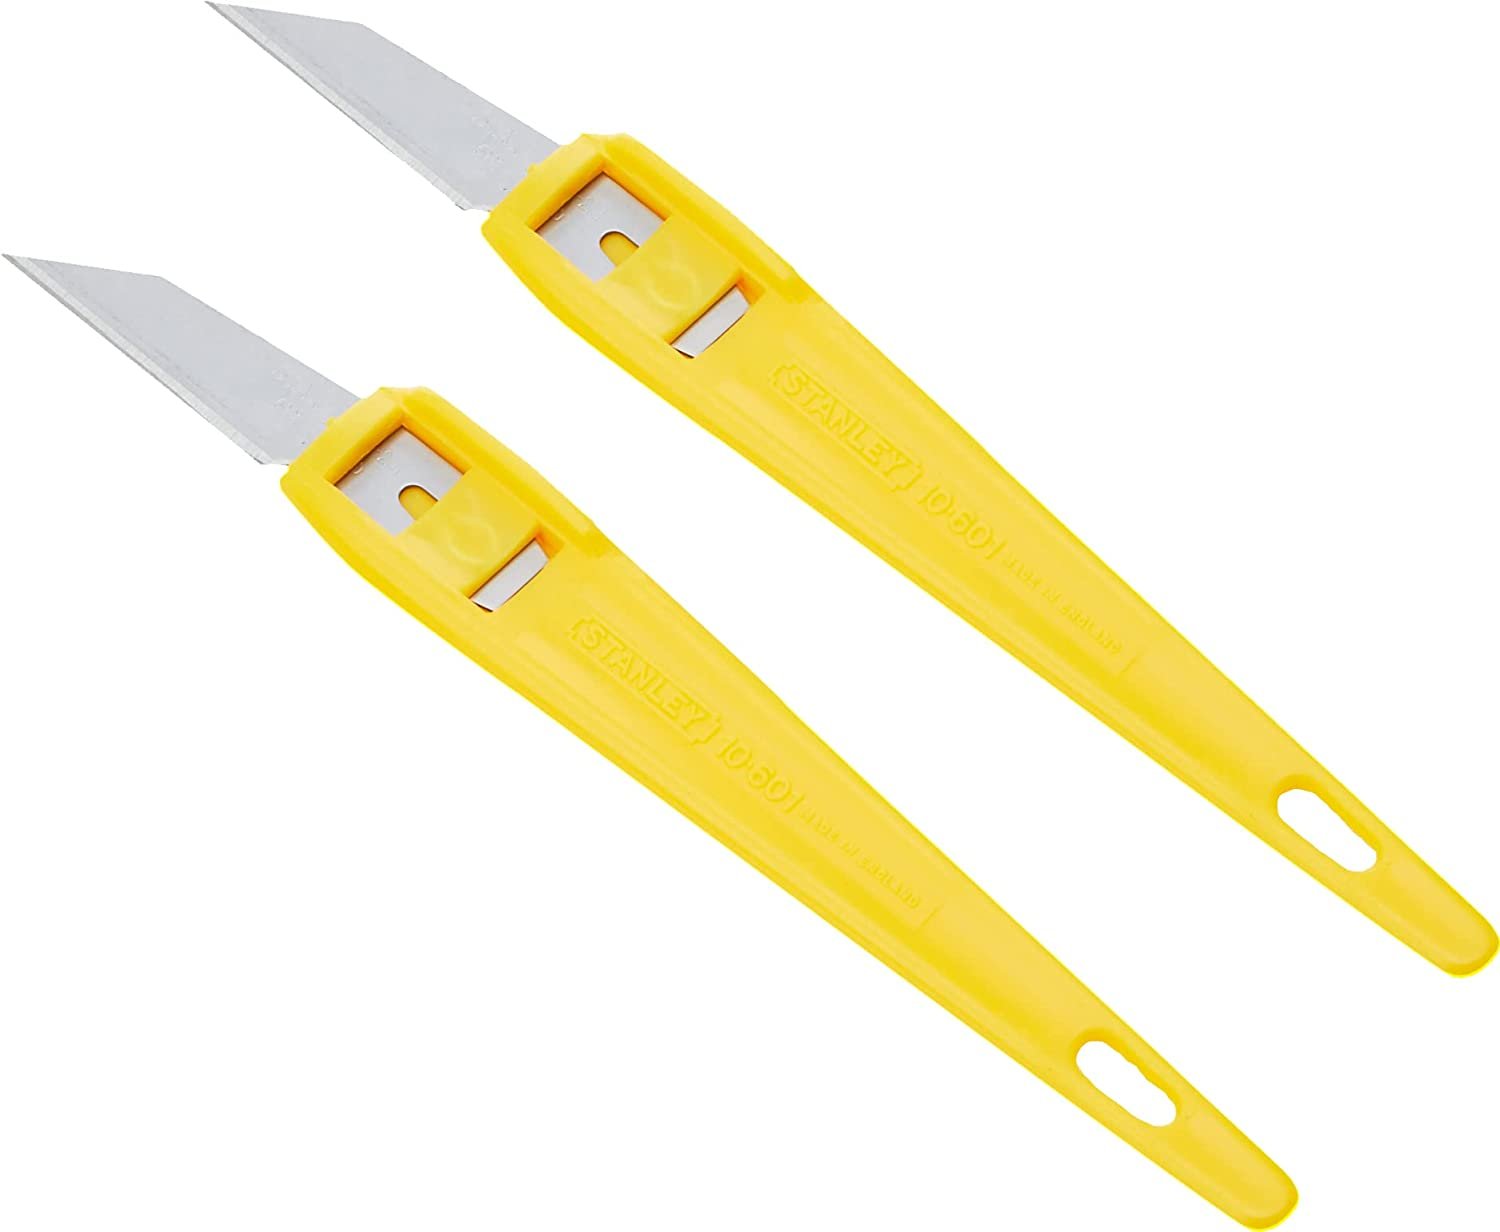
  • Good craft knife, the sharper the better but be careful, for obvious reasons. If you are using a scalpel and blades, change the blade often and dispose of it correctly.

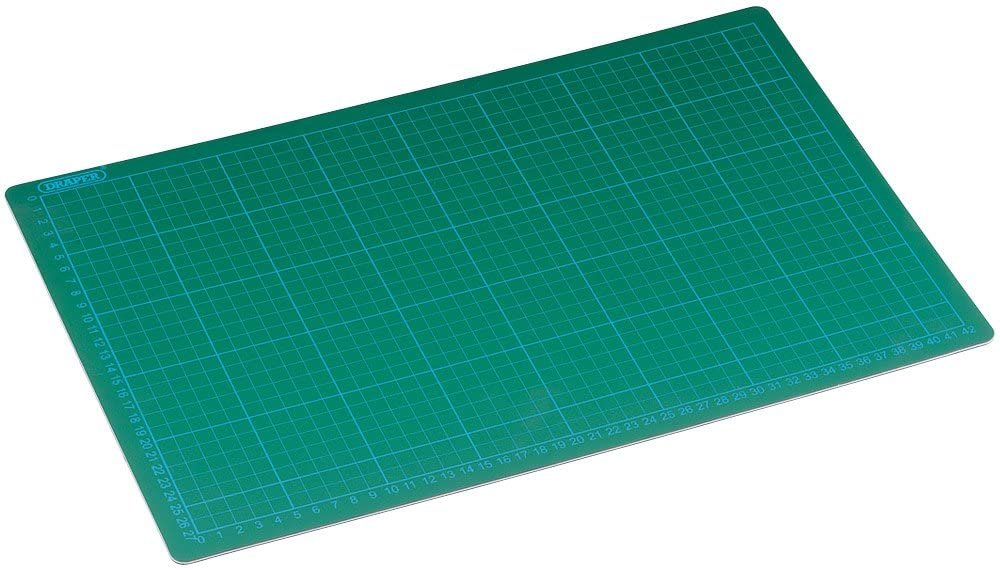
  • Cutting matt so as not to cut your parent’s dining table.

  • Glue, and not tape. ModelMakers use superglue and a whole range of different glues but for this exercise UHU is good, PVA can be used but might not dry flat.

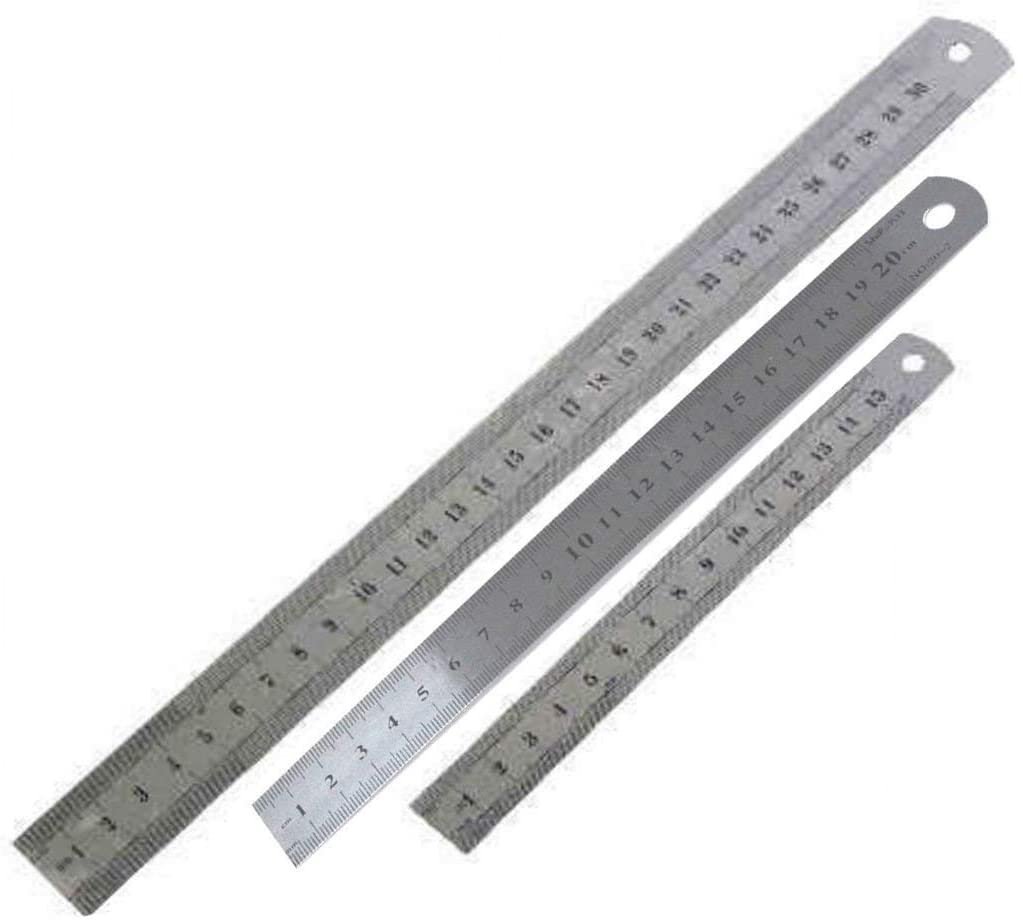
  • Metal ruler, do not use plastic as your blade will hack into it and may slide off and into you. Safety first.

  • Material, any. Try to stick to one colour, I recommend using white. Yes, it seems boring but it looks professional. Don’t spend a lot of money on material, reuse and recycle. Cardboard from boxes and packing is absolutely fine.

  • A bedroom, or room.

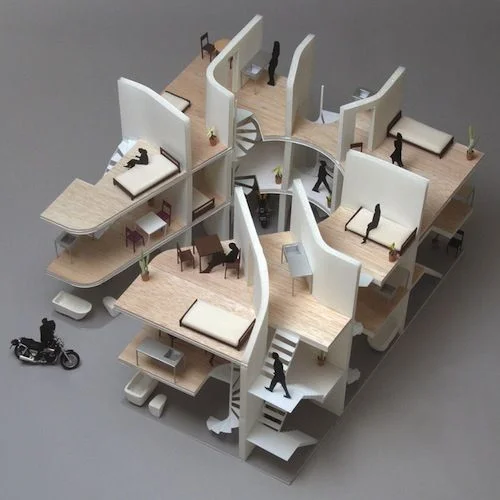
Assignment: Build a Model of Your Bedroom

You are going to try to build a 3D model of your bedroom. So your model will likely have four walls, a floor, door, and windows (or whatever your room looks like).

First, sketch out the outline of your room - this is the floor plan and will help you build the overall structure (walls). Mark where the door is and then cut the walls to fit the right length, then cut the door and windows into the correct walls. This is the basic model of your room.

Next, start to plan out the furniture and create miniatures of your bed, cupboard, desk, chair, mirror, etc until the room feels complete.

Don’t be lazy here - try to recreate as many details within the room as possible.

It gets fun and the more you add to it, the better it will look. And whoever is looking at your model and portfolio will notice.

Start with fabric items such as your bedding (fold paper), curtains (curl or bend paper), and move on to items such as dressing gowns (get super creative with your paper and fabric, add thread, etc) model items on your desk or bedside table like a computer, books, and so on.

If you have time and are able to, try to cut a little silhouette of yourself as a scale person. Look at the door to help you draw out what height you should be compared to the door opening and then stand yourself up in your model.

TOP TIP: Architects and other spatial designers do this all the time in the office. Try building your model in only white materials and mount it on a larger board than the floor, so there’s a kind of frame around it. White (or all one colour, could also be black or cardboard brown) is more forgiving to mistakes and looks a lot more finished - even if it’s not.

Here are some examples from Pinterest

How to present your model in your portfolio

Now take photographs of your model to include in your portfolio as carrying around the actual model is a little impractical and could damage it.

It’s also a good idea to place something beside it to show a scale for the model (if you aren’t happy with your silhouette person) and the detail you have put into it. Use something obvious like a pencil or ruler. Something that would naturally be on hand and not distract from the model itself.

Try out different angles for your photos (front for elevation, top for plan, side on for perspective). You can also consider doing a step-by-step page showing how you constructed your model.

Now either print these out or create a layout on A3 paper (or as a PDF) and add some text explaining the model.


READ MORE BLOG POSTS


How To Use A Scalpel, Cut Material + DIY Sharps Box

How To Use A Scalpel, Cut Material + DIY Sharps Box

Cutting materials by hand is an important skill for a student or young designer, especially in Interior, Architecture, and Model Making. You should learn how to use a surgical blade, craft knife, or scalpel properly to create clean cuts and neat edges to your material, but also to make sure you are not causing yourself any injuries in the cutting, storing, and replacing of your knife and blades. 

watch the videos

1. Always use a cutting mat

The surface of any table is not adequate and you may damage it. This will then cause cut lines in the surface so when you come to draw, the surface is no longer smooth. 

2. Invest in good knifes

There are many to choose from such as Xacto knife, craft knife, surgical knife, etc. Don't just pick up a cheap packet, invest in a good knife and a few packets of replacement blades. 

3. Rulers & Cutting edges

Make sure to always use a metal edge, a long metal ruler is best. I have a few metal rulers of differing lengths. When model making, I use a ruler which will be longer than any material I am cutting. I also tape a length of masking tape to the underside to help give it a grip on the material I am cutting. Do not use a plastic ruler as the blade can slide into it leading to you cutting yourself or the ruler’s straight edge being damaged.

4. Safety first

Keep your fingers back from the edge of the ruler when cutting. Try to stand up when cutting your material and make sure to always be looking at your work. Press firmly on your ruler to hold it in place on the material. Press down on each stroke when cutting with the knife. Never cut through the material is one cut, use 2-3 strokes (a thick card, foam core, etc) to get a cleaner edge. Don't rush. 

5. Fresh blade and often

Replace the blade often to ensure clean cuts and dispose of the old blade in a sharps box. Either wrap in masking tape or better yet, make a DIY sharps box.


READ MORE BLOG POSTS


Architectural Cardboard City, Student Project

This is a project I run with our first-year Interior Architecture students in the first term each year. It looks at urban design, creating a city for the future, and encourages students to be as imaginative as they want to be in creating a model city. 

Working as a class, we discuss the idea of the city and what it means to each student, taking into consideration their background, culture, education, experiences, and so on. We start out in group discussions and, as we develop our ideas for the city, we split into groups and then pairs. Looking at precedent studies of urban design and architecture, students study iconic buildings and inspirational designers to touch on ideas and influence. All of this work is recorded by each student in their handmade sketchbook diary. 

Once a layout has been agreed upon, students then split into pairs. Each pair is given a square (500mm x 500mm) which represents their part of the city. They choose a type of building or function within the city for their square to play out and make sure this is located on the cities layout. Noting down who their neighbors are, the students design out their building, checking and discussing heights, access, views, function, form, etc with their neighbors. Once the design has been agreed with sketches, drawings, and sketch models, they start to build a 1:50 cardboard model. The reason we restrict the students to cardboard is to ensure fairness of materials (they call to source the same supermarket cardboard boxes) and so it does not cost them anything (which in turn highlights the importance of reusing materials and recycling). 

They have a week to design, and a week to model making. At the end of this time, they collectively present their squares, laying one down after the next until the entire city is built. 

watch the video

After the presentations are given, we take some time to reflect on previous discussions and expectations. The students are then given some extra time to add to the overall city as a group. In this time they will add in more scale people, tree and landscaping, different forms of transport and try to connect buildings together with paths or bridges. 

It's a fun and imaginative project which gets students stuck into a making project within the first few weeks of their course - and the older students enjoy coming in for the presentation too. 


What would you have in your city of the future?


READ MORE BLOG POSTS